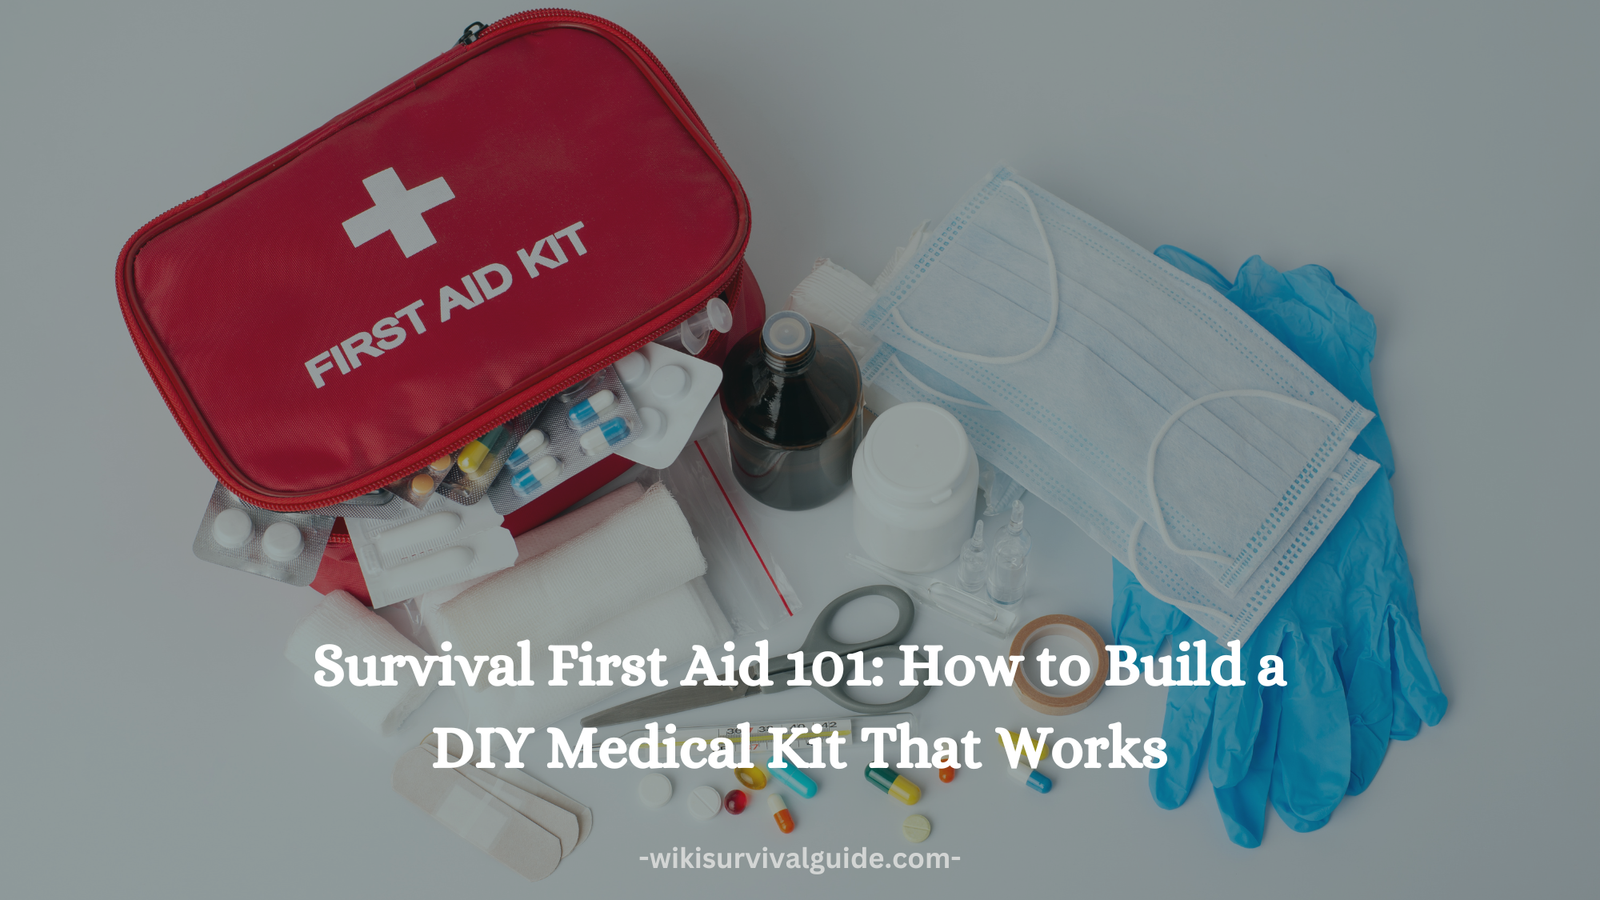
When disaster strikes, being prepared can make all the difference. Survival First Aid 101: How to Build a DIY Medical Kit That Works is not just about carrying band-aids—it’s about having the right supplies to handle emergencies when professional help isn’t available. Whether you’re an outdoor adventurer, a prepper, or just want to be ready for the unexpected, having a customized first aid kit can be a lifesaver.
Understanding Survival First Aid
Survival first aid is a crucial skill that prepares you to handle medical emergencies when professional healthcare isn’t accessible. Unlike basic first aid, which focuses on minor injuries, survival first aid involves treating wounds, managing fractures, stopping severe bleeding, and even performing life-saving procedures when necessary. Whether you’re in a remote location, facing a natural disaster, or preparing for unexpected emergencies, having survival first aid knowledge can be the difference between life and death.
One of the most important aspects of survival first aid is situational awareness. You must quickly assess injuries, determine their severity, and decide on the best course of action. For example, in a survival situation, a deep wound that might be minor in a hospital setting could become life-threatening due to infection or excessive blood loss.
Essential survival first aid techniques include:
- Bleeding Control – Using direct pressure, elevation, and tourniquets to stop excessive bleeding.
- Wound Care – Cleaning and dressing wounds to prevent infection.
- Fracture Management – Splinting broken bones to prevent further injury.
- Shock Treatment – Recognizing and stabilizing a person in shock.
- CPR and Rescue Breathing – Knowing how to perform life-saving resuscitation techniques.
Having a DIY medical kit with the right supplies ensures you can apply these skills when needed. Without proper preparation, even small injuries can escalate into severe problems in survival situations.
Learning survival first aid isn’t just for preppers or adventurers—it’s essential knowledge for anyone who values safety and self-reliance. Investing time in first aid training and building a well-equipped medical kit ensures you’re ready for any emergency.
Why a DIY Medical Kit is Essential
A DIY medical kit isn’t just another piece of survival gear—it’s a lifeline in emergencies. Unlike pre-made first aid kits, which often contain limited supplies, a DIY kit allows you to customize it to your specific needs. Whether you’re an outdoor enthusiast, a prepper, or simply want to be ready for unexpected injuries, having a personalized medical kit can be the difference between minor inconvenience and serious danger.
One major advantage of a DIY medical kit is customization. Store-bought kits often lack critical items such as prescription medications, trauma supplies, or specialized tools. By assembling your own kit, you can ensure it includes everything necessary for your unique circumstances.
Benefits of a DIY medical kit:
- Tailored to Your Needs – You can add essential medications, allergy treatments, or personal medical supplies.
- Higher Quality Supplies – Many store-bought kits use cheap, low-quality materials. A DIY kit allows you to choose durable and effective tools.
- Scalability – You can create multiple versions: a compact kit for everyday carry (EDC) and a larger one for home or vehicle use.
- Familiarity – When you build your own kit, you know exactly what’s inside and how to use each item in an emergency.
A well-prepared medical kit should cover everything from minor scrapes to severe trauma. Consider adding hemostatic agents for bleeding control, a tourniquet for serious injuries, and a suture kit for deep wounds. These items are rarely found in generic first aid kits but are crucial for survival situations.
By taking the time to assemble a DIY medical kit, you ensure that you and your loved ones are always prepared. Emergencies can happen anytime—don’t wait until disaster strikes to realize you’re unprepared.
Key Components of a DIY Medical Kit
A well-rounded DIY medical kit should include essential items for wound care, infection prevention, pain management, and emergency treatment. The key is to cover a wide range of medical situations without overloading your kit with unnecessary supplies.
The core components of a survival medical kit include:
1. Trauma and Wound Care
- Sterile gauze pads – To dress wounds and absorb blood.
- Adhesive bandages – For minor cuts and scrapes.
- Antiseptic wipes – To clean wounds and prevent infection.
- Medical tape – To secure dressings in place.
- Hemostatic agents – To stop severe bleeding.
- Tourniquet – For life-threatening hemorrhages.
2. Medications and Pain Relief
- Ibuprofen or acetaminophen – For pain and inflammation.
- Antihistamines – To treat allergic reactions.
- Antibiotic ointment – To prevent infection in wounds.
- Anti-diarrheal medication – In case of food poisoning or illness.
- Electrolyte tablets – To prevent dehydration.
3. Tools and Instruments
- Scissors and tweezers – For cutting bandages and removing splinters.
- Thermometer – To check for fever.
- CPR face shield – For safe rescue breathing.
- Gloves and masks – To maintain hygiene.
- Suture kit or butterfly closures – For deep wounds.
4. Personal Items and Custom Additions
- Prescription medications – If you have any medical conditions.
- Epinephrine injector – For severe allergic reactions.
- Emergency contact information – In case of a medical crisis.
By including these essential components, you’ll be equipped to handle a wide variety of injuries and medical emergencies, whether at home, on the road, or in the wilderness.
Basic First Aid Supplies You Need
When assembling a DIY medical kit, certain basic supplies are non-negotiable. These everyday items form the foundation of first aid and should be included in every emergency kit.
Bandages and Dressings
- Adhesive bandages (various sizes) – For minor cuts and blisters.
- Sterile gauze pads – For dressing larger wounds.
- Rolled bandages – For securing gauze in place.
- Butterfly closures – For closing small wounds without stitches.
Antiseptics and Cleaning Supplies
- Antiseptic wipes – To clean wounds before dressing them.
- Hydrogen peroxide – For disinfecting cuts and abrasions.
- Alcohol pads – To sanitize tools and skin.
Pain Relief and Medications
- Ibuprofen or acetaminophen – For general pain relief.
- Antihistamines – To treat allergic reactions and itching.
- Aspirin – To help with potential heart attacks.
First Aid Tools
- Medical tape – To secure bandages.
- Scissors and tweezers – For precise cutting and splinter removal.
- Digital thermometer – To monitor body temperature.
- Safety pins – For securing bandages.
These basic first aid supplies form the backbone of any medical kit. Whether you’re treating a small scrape or a deep wound, having the right tools on hand makes all the difference.
Medications to Include in Your Kit
Including medications in your DIY medical kit ensures that you’re prepared for a wide range of health issues, from minor pain to life-threatening allergic reactions. It’s important to stock up on essential over-the-counter (OTC) medications and any personal prescriptions.
Pain Relief and Fever Reducers
- Ibuprofen (Advil) – For pain and inflammation.
- Acetaminophen (Tylenol) – For fever and mild pain relief.
- Aspirin – Can help in case of a heart attack.
Allergy and Respiratory Medications
- Antihistamines (Benadryl, Claritin) – To treat allergies and insect bites.
- Epinephrine (EpiPen) – For severe allergic reactions.
- Cough suppressants and lozenges – For respiratory relief.
Gastrointestinal and Digestive Medications
- Anti-diarrheal medication (Imodium) – To prevent dehydration from diarrhea.
- Antacids (Tums, Pepto-Bismol) – For acid reflux and stomach discomfort.
- Electrolyte tablets – To restore hydration levels.
Topical Medications and Ointments
- Antibiotic ointment (Neosporin) – To prevent infections in wounds.
- Hydrocortisone cream – For itching and rashes.
By including these essential medications, you ensure that your DIY medical kit is fully prepared for any emergency, from minor headaches to life-threatening conditions.
Wound Care Essentials for Emergencies
Proper wound care is one of the most critical aspects of survival first aid. In emergency situations, untreated wounds can lead to infections, prolonged healing times, and even life-threatening complications like sepsis. Having the right supplies and knowledge ensures that wounds are treated effectively to prevent further health risks.
Essential Wound Care Supplies
To treat wounds in an emergency, your DIY medical kit should include:
- Sterile gauze pads – To absorb blood and protect wounds.
- Medical tape – To secure dressings in place.
- Adhesive bandages – For small cuts and abrasions.
- Antiseptic wipes – To disinfect wounds and prevent infection.
- Hydrogen peroxide or iodine solution – For cleaning deep wounds.
- Hemostatic agents (like QuikClot) – To stop severe bleeding quickly.
- Tourniquet – For life-threatening bleeding control.
- Butterfly closures or sutures – For deep cuts that need stitching.
Steps for Emergency Wound Care
- Stop the bleeding – Apply direct pressure with sterile gauze and elevate the wound if possible.
- Clean the wound – Use antiseptic wipes or a saline solution to remove dirt and bacteria.
- Apply dressing – Cover the wound with a sterile gauze pad and secure it with medical tape.
- Monitor for infection – Look for signs like redness, swelling, pus, or fever.
- Change bandages regularly – Keep the wound clean and dry to promote healing.
In remote or survival situations, wound care becomes even more critical. Improper treatment can lead to infections, which may require antibiotics or even surgical intervention. Having the right tools and knowing how to use them ensures that wounds don’t become life-threatening.
Emergency Medical Tools and Equipment
A well-prepared DIY medical kit isn’t complete without the right emergency medical tools. These tools help in performing essential first aid procedures, treating injuries, and stabilizing patients in survival situations.
Essential Medical Tools
- Trauma shears – To cut clothing and bandages quickly.
- Tweezers – For removing splinters, debris, or ticks from wounds.
- Scalpel or utility knife – For cutting precise incisions if needed.
- Digital thermometer – To monitor fever and infections.
- CPR face shield or mask – To provide rescue breathing safely.
- Irrigation syringe – For flushing out wounds with saline.
- Tourniquet – To control severe bleeding in emergencies.
- Splints and elastic bandages – For stabilizing fractures and sprains.
Why These Tools Matter
In a survival situation, having the right tools can mean the difference between life and death. For example:
- A tourniquet can prevent a person from bleeding out in a few minutes.
- A CPR mask ensures safe mouth-to-mouth resuscitation.
- Scalpels and tweezers allow you to remove embedded debris safely.
Using Emergency Medical Tools Effectively
- Train yourself – Simply having tools isn’t enough; learn how to use them through first aid courses.
- Keep tools clean – Sterilize scalpels, tweezers, and syringes to avoid infections.
- Store them properly – Keep tools in a dry, organized section of your medical kit for quick access.
A DIY medical kit with the right emergency tools ensures you’re prepared for any medical situation, from minor injuries to life-threatening trauma.
Customizing Your Medical Kit for Different Scenarios
Not all medical kits should be the same. Your kit should be customized based on where you plan to use it, the risks involved, and the number of people relying on it. A basic home first aid kit will differ from an outdoor survival kit or a vehicle emergency kit.
1. Home First Aid Kit
A home kit is designed for common injuries like cuts, burns, fevers, and allergic reactions. It should include:
- Bandages, gauze, antiseptics, and ointments.
- Pain relievers, fever reducers, and antihistamines.
- Cold packs and burn gel for minor burns.
- Prescription medications as needed.
2. Outdoor and Wilderness Survival Kit
For hiking, camping, and survival situations, your kit must include:
- Snake bite kit and insect repellent.
- Heavy-duty tourniquet and hemostatic agents.
- Emergency splints and survival blankets.
- Extra water purification tablets to prevent dehydration-related issues.
3. Car Emergency Medical Kit
A car kit is crucial for road trips and unexpected roadside injuries. It should have:
- First aid manual for quick reference.
- Trauma supplies in case of a serious accident.
- Flashlight and extra batteries.
- Emergency contacts and a whistle.
4. Travel Medical Kit
If you’re traveling, especially internationally, your medical kit should contain:
- Motion sickness pills.
- Digestive aids for food poisoning.
- Copies of prescriptions and extra medications.
- A list of nearby hospitals in your travel area.
By customizing your medical kit, you ensure it meets the specific needs of any situation, providing the best possible care wherever you are.
How to Pack and Organize Your DIY Medical Kit
Packing and organizing your DIY medical kit properly ensures that in an emergency, you can find exactly what you need without wasting time. A well-organized kit can save lives, while a messy one can slow down treatment.
Step-by-Step Guide to Packing Your Medical Kit
- Use a waterproof and durable container – A hard-shell case or a waterproof bag keeps supplies dry and protected.
- Categorize items into sections – Group similar items together for easy access:
- Trauma care: Bandages, gauze, tourniquet, hemostatic agents.
- Medications: Pain relievers, antihistamines, anti-diarrheal.
- Tools and instruments: Tweezers, scissors, thermometer.
- Personal items: Prescription medications, medical history notes.
- Trauma care: Bandages, gauze, tourniquet, hemostatic agents.
- Label everything clearly – Use small pouches or zip-lock bags with labels for quick identification.
- Keep frequently used items accessible – Items like band-aids and antiseptic wipes should be easy to reach.
- Include an instruction guide – A basic first aid manual or cheat sheet helps in emergencies.
Organizing for Efficiency
- Color-code or separate by urgency – Keep life-saving items (tourniquet, hemostatic agents) in an easily accessible pocket.
- Use resealable plastic bags – This keeps medications and smaller tools dry and organized.
- Perform regular inventory checks – Ensure that nothing is missing or expired.
By packing your kit in a structured and logical way, you can handle medical emergencies efficiently when every second counts.
Best Storage Practices for Your Medical Supplies
Proper storage of medical supplies is essential to keep them effective and ready for use. Poor storage can lead to contamination, expired medications, and damaged tools, making them useless in an emergency.
Best Practices for Storing Your Medical Kit
- Keep it in a cool, dry place – Avoid extreme heat or moisture, which can degrade medications and bandages.
- Use airtight containers – A sealed case prevents dust, dirt, and water from getting in.
- Check expiration dates regularly – Medications and antiseptics lose their effectiveness over time. Replace expired items promptly.
- Separate liquid medications – Store liquid medicine in leak-proof bottles and place them in a zip-lock bag.
- Keep sharp tools covered – Scissors, scalpels, and needles should be in protective covers to prevent accidental injuries.
- Store an emergency kit in multiple locations – Have one at home, one in your vehicle, and a compact version in your backpack.
A well-maintained medical kit ensures that when an emergency arises, all supplies are in optimal condition, ready to be used at a moment’s notice.
Essential Survival First Aid Skills Everyone Should Know
Knowing essential survival first aid skills can mean the difference between life and death in an emergency. When medical help isn’t immediately available, your ability to act quickly and correctly can prevent complications and improve survival outcomes.
Key Survival First Aid Skills
- Stopping Severe Bleeding
- Apply direct pressure with a sterile cloth or gauze.
- Elevate the wound above heart level if possible.
- Use a tourniquet only as a last resort.
- Apply direct pressure with a sterile cloth or gauze.
- Treating Burns and Open Wounds
- Cool burns immediately with clean water (not ice).
- Cover with a sterile dressing to prevent infection.
- Avoid popping blisters, as they protect against infection.
- Cool burns immediately with clean water (not ice).
- Handling Fractures and Sprains
- Immobilize the injured limb using a splint.
- Apply cold packs to reduce swelling.
- Keep the limb elevated when possible.
- Immobilize the injured limb using a splint.
- Recognizing and Treating Shock
- Look for pale skin, rapid breathing, and confusion.
- Lay the person down and elevate their legs.
- Keep them warm and calm.
- Look for pale skin, rapid breathing, and confusion.
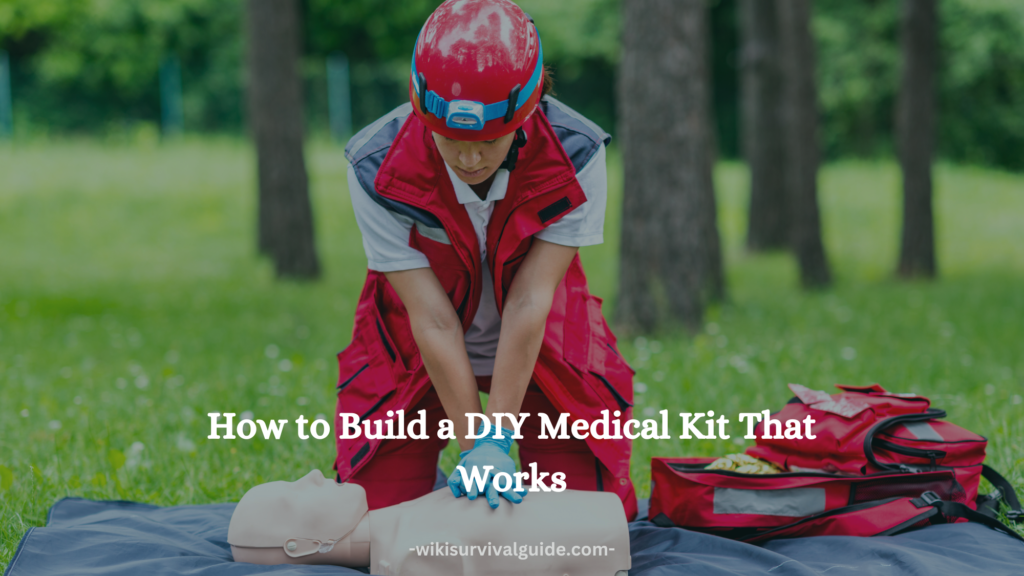
- Performing CPR (Cardiopulmonary Resuscitation)
- Give 30 chest compressions followed by 2 rescue breaths.
- Continue until professional help arrives or the person regains consciousness.
- Give 30 chest compressions followed by 2 rescue breaths.
Practicing these survival first aid skills regularly ensures that you’re always prepared to handle medical emergencies effectively, even in the most challenging conditions.
How to Stop Severe Bleeding in an Emergency
Uncontrolled bleeding can be fatal within minutes. Knowing how to stop severe bleeding quickly is one of the most vital survival first aid skills.
Steps to Control Severe Bleeding
- Apply Direct Pressure
- Use a clean cloth, gauze, or even clothing to press firmly on the wound.
- Maintain constant pressure for several minutes.
- Use a clean cloth, gauze, or even clothing to press firmly on the wound.
- Elevate the Injured Limb
- If possible, raise the wounded area above heart level to slow bleeding.
- If possible, raise the wounded area above heart level to slow bleeding.
- Use a Tourniquet for Life-Threatening Bleeding
- Only apply a tourniquet if direct pressure fails and bleeding is life-threatening.
- Position it above the wound (between the wound and the heart).
- Tighten until bleeding stops and note the time—loosen it every 15–20 minutes if medical help is delayed.
- Only apply a tourniquet if direct pressure fails and bleeding is life-threatening.
- Apply Hemostatic Agents if Available
- Hemostatic dressings (like QuikClot) help blood clot faster.
- Pack the wound tightly with hemostatic gauze and apply pressure.
- Hemostatic dressings (like QuikClot) help blood clot faster.
- Monitor for Shock
- If the person becomes pale, weak, or dizzy, keep them warm and calm while waiting for emergency assistance.
- If the person becomes pale, weak, or dizzy, keep them warm and calm while waiting for emergency assistance.
Stopping bleeding fast and efficiently can save lives, especially in survival or disaster scenarios where medical help is far away.
Treating Burns, Cuts, and Open Wounds
Burns, cuts, and open wounds are common injuries in survival situations. Proper treatment prevents infection, promotes healing, and reduces long-term damage.
Treating Burns
- Cool the Burn Immediately
- Hold the burn under cool running water for at least 10–15 minutes.
- If water isn’t available, use a cold compress—but avoid ice.
- Hold the burn under cool running water for at least 10–15 minutes.
- Apply a Sterile Dressing
- Cover the burn with a non-stick sterile bandage.
- Avoid ointments or butter, as they trap heat.
- Cover the burn with a non-stick sterile bandage.
- Pain Management
- Take over-the-counter pain relievers like ibuprofen.
- Keep the area clean and dry.
- Take over-the-counter pain relievers like ibuprofen.
Treating Cuts and Open Wounds
- Stop Bleeding – Apply direct pressure with a clean cloth or gauze.
- Clean the Wound – Use sterile water or antiseptic to flush out dirt.
- Apply Antibiotic Ointment – Prevents infection and speeds healing.
- Cover with a Bandage – Protects the wound from bacteria.
- Monitor for Signs of Infection – Redness, swelling, pus, or fever require medical attention.
Properly treating burns, cuts, and open wounds prevents infections, reduces pain, and ensures faster recovery.
Managing Fractures and Sprains in Survival Situations
A broken bone or severe sprain can make movement difficult, and in a survival situation, improper treatment can worsen the injury. Knowing how to immobilize and manage fractures is crucial for survival.
Identifying a Fracture vs. a Sprain
- Fracture (Broken Bone): Severe pain, swelling, bone deformity, inability to move.
- Sprain: Pain, swelling, bruising, but no obvious deformity.
First Aid for Fractures
- Immobilize the Injury
- Use splints (a rigid object like sticks, rolled-up fabric, or a piece of cardboard) to stabilize the limb.
- Secure with bandages or strips of cloth, but don’t tie too tightly.
- Use splints (a rigid object like sticks, rolled-up fabric, or a piece of cardboard) to stabilize the limb.
- Apply Ice to Reduce Swelling
- Wrap ice or cold packs in a cloth and apply for 15–20 minutes every hour.
- Wrap ice or cold packs in a cloth and apply for 15–20 minutes every hour.
- Elevate if Possible
- Keeping the injured limb elevated helps reduce swelling.
- Keeping the injured limb elevated helps reduce swelling.
- Do Not Attempt to Realign the Bone
- Moving a fractured bone incorrectly can cause more damage.
- Moving a fractured bone incorrectly can cause more damage.
First Aid for Sprains
- Follow the R.I.C.E Method:
- Rest: Avoid using the injured limb.
- Ice: Apply ice packs to reduce swelling.
- Compression: Wrap with an elastic bandage.
- Elevation: Keep the injured limb elevated above heart level.
- Rest: Avoid using the injured limb.
- Pain Management
- Over-the-counter pain relievers (like ibuprofen) help reduce inflammation.
- Over-the-counter pain relievers (like ibuprofen) help reduce inflammation.
Handling fractures and sprains properly prevents further damage and speeds up recovery in a survival setting.
Recognizing and Handling Shock in Emergencies
Shock is a life-threatening condition that occurs when the body isn’t getting enough blood flow. It can be caused by severe bleeding, burns, trauma, infections, or extreme dehydration. Recognizing the symptoms and treating shock immediately can save a life.
Signs of Shock
- Pale, clammy skin
- Rapid heartbeat and weak pulse
- Confusion, dizziness, or fainting
- Shallow breathing
- Extreme weakness or unconsciousness
First Aid for Shock
- Lay the Person Down
- Keep them flat on their back and elevate their legs (unless there’s a spinal injury).
- Keep them flat on their back and elevate their legs (unless there’s a spinal injury).
- Keep Them Warm
- Use a blanket, jacket, or emergency survival blanket to prevent heat loss.
- Use a blanket, jacket, or emergency survival blanket to prevent heat loss.
- Loosen Tight Clothing
- This improves circulation and comfort.
- This improves circulation and comfort.
- Provide Reassurance
- Keep the person calm and still to avoid worsening their condition.
- Keep the person calm and still to avoid worsening their condition.
- If Unconscious, Check Breathing
- Perform CPR if needed.
- Perform CPR if needed.
What NOT to Do
- Do NOT give food or drinks – The person may choke.
- Do NOT move them unnecessarily if there’s a risk of spinal injury.
Shock is extremely dangerous and requires immediate medical attention. Recognizing it early and taking the right steps increases survival chances in emergencies.
When to Seek Professional Medical Help in Survival Situations
In survival situations, knowing when to seek professional medical help is just as important as knowing how to provide first aid. While many injuries and illnesses can be managed with a DIY medical kit, some conditions require urgent medical intervention to prevent serious complications or death.
Critical Situations Requiring Professional Help
- Severe Bleeding That Won’t Stop
- If direct pressure, elevation, and a tourniquet fail to stop heavy bleeding, medical attention is necessary.
- If direct pressure, elevation, and a tourniquet fail to stop heavy bleeding, medical attention is necessary.
- Signs of Internal Bleeding
- Symptoms include abdominal pain, swelling, dizziness, fainting, or vomiting blood. Internal bleeding is life-threatening and requires emergency care.
- Symptoms include abdominal pain, swelling, dizziness, fainting, or vomiting blood. Internal bleeding is life-threatening and requires emergency care.
- Serious Burns (Third-Degree or Large Second-Degree Burns)
- If a burn is blackened, charred, or covers a large area, it needs professional treatment to prevent shock and infection.
- If a burn is blackened, charred, or covers a large area, it needs professional treatment to prevent shock and infection.
- Suspected Broken Bones with Bone Protrusion
- A compound fracture (where the bone pierces the skin) requires advanced medical care to prevent infection and set the bone properly.
- A compound fracture (where the bone pierces the skin) requires advanced medical care to prevent infection and set the bone properly.
- Head Injuries with Loss of Consciousness
- A person who passes out, has a seizure, or is confused after a head injury may have a traumatic brain injury.
- A person who passes out, has a seizure, or is confused after a head injury may have a traumatic brain injury.
- Severe Infections That Don’t Improve
- If a wound becomes red, swollen, warm, or oozes pus, and is accompanied by fever, professional care is needed.
- If a wound becomes red, swollen, warm, or oozes pus, and is accompanied by fever, professional care is needed.
- Difficulty Breathing or Chest Pain
- These could signal severe allergic reactions, heart attacks, or collapsed lungs—all of which require immediate medical attention.
- These could signal severe allergic reactions, heart attacks, or collapsed lungs—all of which require immediate medical attention.
- Severe Dehydration or Heat Stroke
- Symptoms include no urination, extreme weakness, confusion, or unconsciousness.
- Symptoms include no urination, extreme weakness, confusion, or unconsciousness.
- Animal Bites or Deep Puncture Wounds
- Risk of rabies, tetanus, and infection makes these injuries high priority for medical treatment.
- Risk of rabies, tetanus, and infection makes these injuries high priority for medical treatment.
Knowing when to seek professional medical help could save a life. If evacuation is possible, don’t hesitate to get advanced medical assistance when symptoms are beyond your ability to treat.
Learning First Aid: Best Courses and Resources
Investing time in learning first aid ensures you’re prepared for medical emergencies in any situation. A well-trained individual can stabilize injuries, prevent complications, and increase survival rates.
Best First Aid Courses
- American Red Cross First Aid & CPR Courses
- Covers CPR, wound care, and emergency response.
- Available online and in-person.
- Covers CPR, wound care, and emergency response.
- National Safety Council (NSC) First Aid Training
- Offers training on bleeding control, fractures, and medical emergencies.
- Offers training on bleeding control, fractures, and medical emergencies.
- Wilderness First Responder (WFR) Certification
- Ideal for preppers, hikers, and outdoor survivalists.
- Focuses on treating injuries in remote locations where help is unavailable.
- Ideal for preppers, hikers, and outdoor survivalists.
- Stop The Bleed Program
- Teaches life-saving techniques to control severe bleeding in emergencies.
- Teaches life-saving techniques to control severe bleeding in emergencies.
- Online Courses (Udemy, Coursera, and FEMA)
- Self-paced training for basic and advanced first aid skills.
- Self-paced training for basic and advanced first aid skills.
Best First Aid Books & Resources
- “The Survival Medicine Handbook” by Joseph Alton, MD – A must-read for survivalists.
- “Wilderness Medicine” by Dr. Eric Weiss – Practical medical advice for remote situations.
- Red Cross First Aid App – A mobile-friendly guide for quick reference.
Enrolling in a first aid course and keeping reliable medical resources handy ensures you’re always prepared to handle emergencies confidently.
Maintaining and Updating Your DIY Medical Kit
A well-maintained first aid kit is only effective if it’s regularly checked, restocked, and updated. Over time, medications expire, supplies get used, and new health risks emerge.
How Often Should You Check Your Kit?
- Inspect your medical kit every 3–6 months.
- Replace expired medications, damaged packaging, and depleted supplies.
- Update your kit based on new medical needs or seasonal threats (e.g., heatstroke remedies in summer, frostbite treatment in winter).
Key Areas to Update
- Expired Medications
- Check pain relievers, antihistamines, antibiotics, and antiseptics.
- Check pain relievers, antihistamines, antibiotics, and antiseptics.
- Sterile Supplies
- Replace bandages, gauze, and wound dressings that have been used or are no longer sterile.
- Replace bandages, gauze, and wound dressings that have been used or are no longer sterile.
- Emergency Tools & Batteries
- Flashlights, thermometers, and digital blood pressure monitors need working batteries.
- Flashlights, thermometers, and digital blood pressure monitors need working batteries.
- Specialized Items Based on Family or Group Needs
- If someone in your group develops new allergies or medical conditions, add necessary medications.
- If someone in your group develops new allergies or medical conditions, add necessary medications.
- Seasonal Adjustments
- Include sunscreen, insect repellent, electrolyte packets in hot climates.
- Add thermal blankets, hand warmers, and extra gloves for cold weather.
- Include sunscreen, insect repellent, electrolyte packets in hot climates.
Storage Tips for Longevity
- Keep your kit in a cool, dry place to prevent medicine degradation.
- Use waterproof containers to protect against moisture and damage.
- Store a smaller, portable version of your kit in a bug-out bag, vehicle, or workplace.
Regular maintenance ensures your DIY medical kit is always ready for unexpected emergencies.
Final Thoughts on Survival First Aid Preparedness
Being prepared for medical emergencies isn’t just about having a DIY medical kit—it’s about knowing how to use it effectively.
Key Takeaways
- Build a well-stocked kit with essentials like wound care, medications, and emergency tools.
- Learn critical first aid skills like stopping bleeding, treating burns, and handling fractures.
- Know when to seek professional help—some conditions require immediate medical attention.
- Take first aid courses to gain hands-on experience and stay informed.
- Regularly check and update your kit to keep it functional and reliable.
By staying informed, practicing first aid, and keeping your medical supplies in top condition, you’ll be better equipped to handle emergencies confidently—whether in the wilderness, during a disaster, or at home.
Conclusion
Building a DIY medical kit isn’t just about having supplies—it’s about being prepared for the unexpected. Whether you’re hiking, traveling, or simply want to be ready for an emergency, knowing how to treat injuries can be life-saving. Take the time to create your custom kit today, because when it comes to survival, being proactive is your best defense.
FAQs
1. What are the must-have items in a DIY medical kit?
A solid kit includes bandages, antiseptics, pain relievers, a tourniquet, and emergency tools like scissors and tweezers.
2. How often should I check and restock my survival first aid kit?
You should check it every three to six months and replace expired medications and used supplies.
3. Can I build a DIY medical kit on a budget?
Absolutely! Start with the basics and add specialized items over time.
4. What’s the best way to store medications in a survival kit?
Keep them in a waterproof, airtight container and store in a cool, dark place.
5. Is a survival first aid kit different from a regular first aid kit?
Yes! A survival kit includes more advanced tools like tourniquets, hemostatic agents, and supplies for extreme situations.
1 Comment